
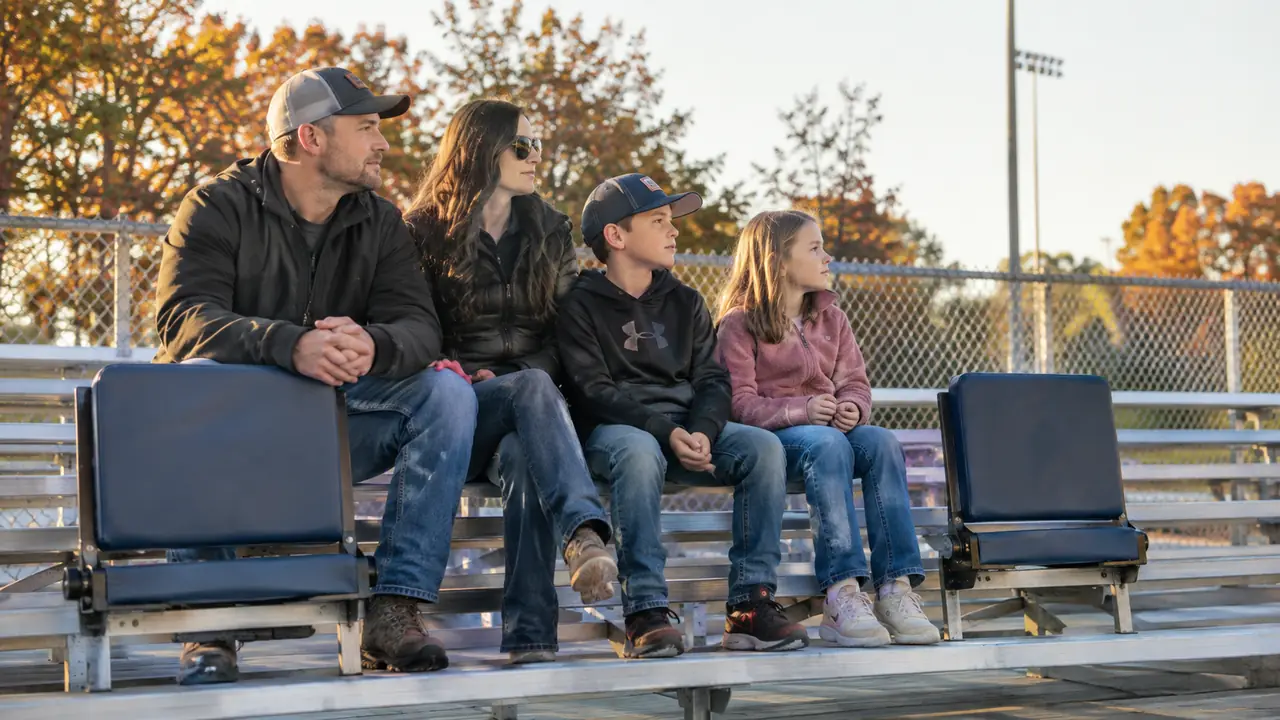
The first time we took Caleb to an away game on the other side of the county, I figured the bleachers would be fine. They were not. By halftime my back ached, Dave kept shifting every few minutes, and Caleb announced he was done sitting on cold metal. We drove home in silence, which for our family means everyone was too sore to talk. That is the day I started looking for a real answer, and the answer turned out to be a folding stadium seat from Sport Beats. Two seasons later, it is the piece of gear I tell every parent to buy before the first game of the year.
This guide walks through the whole process: how to pick the right seat, how to clip it on so it stays put, how to sit in it so your back actually gets the support, and how to carry it so you are not wrestling with it in the parking lot. I have done all of this at youth football games, at a Seahawks tailgate in Seattle, and on bleachers that were built before I was born. The steps work on all of them.
Skip the sore back this season
The Sport Beats Stadium Seat clips onto any bleacher bench, folds flat, and carries over your shoulder. It is the seat we have used for two full seasons of youth football.
Amazon Check Today's Price on Amazon →Step 1: Pick a seat with back support, not just padding
A plain seat cushion takes the edge off the metal, but it does nothing for your lower back. After an hour on bleachers, that is the part that hurts most. A stadium seat with a backrest changes the whole experience because it gives your spine something to lean against, and it keeps you from slumping forward the way you do on a bare bench.
The Sport Beats Stadium Seat has a padded seat and a padded back support that clip onto the bench. That is the feature I would not give up. When Caleb's games run long, I can lean back and actually relax between plays instead of bracing myself the whole time. If you are shopping for your own seat, make back support the first thing on your list, not an afterthought.
Look for a seat that folds flat when you are done. Some seats are bulky and awkward to carry, but a folding design means you can tuck it under your arm or sling it over your shoulder and head to the car with both hands free for the cooler and the kids.
I learned this the hard way during Caleb's first season. I bought a cheap cushion that was basically a square of foam with a handle, and it worked for about one quarter. By the second quarter I was sliding forward on the metal, and by the fourth I was sitting on my jacket just to get some padding. That cushion now lives in the garage, and the Sport Beats seat is what comes to every game. The difference is not subtle: the backrest changes where the pressure lands, so my hips and lower back are not doing all the work.
Step 2: Clip it on the right way so it does not slide
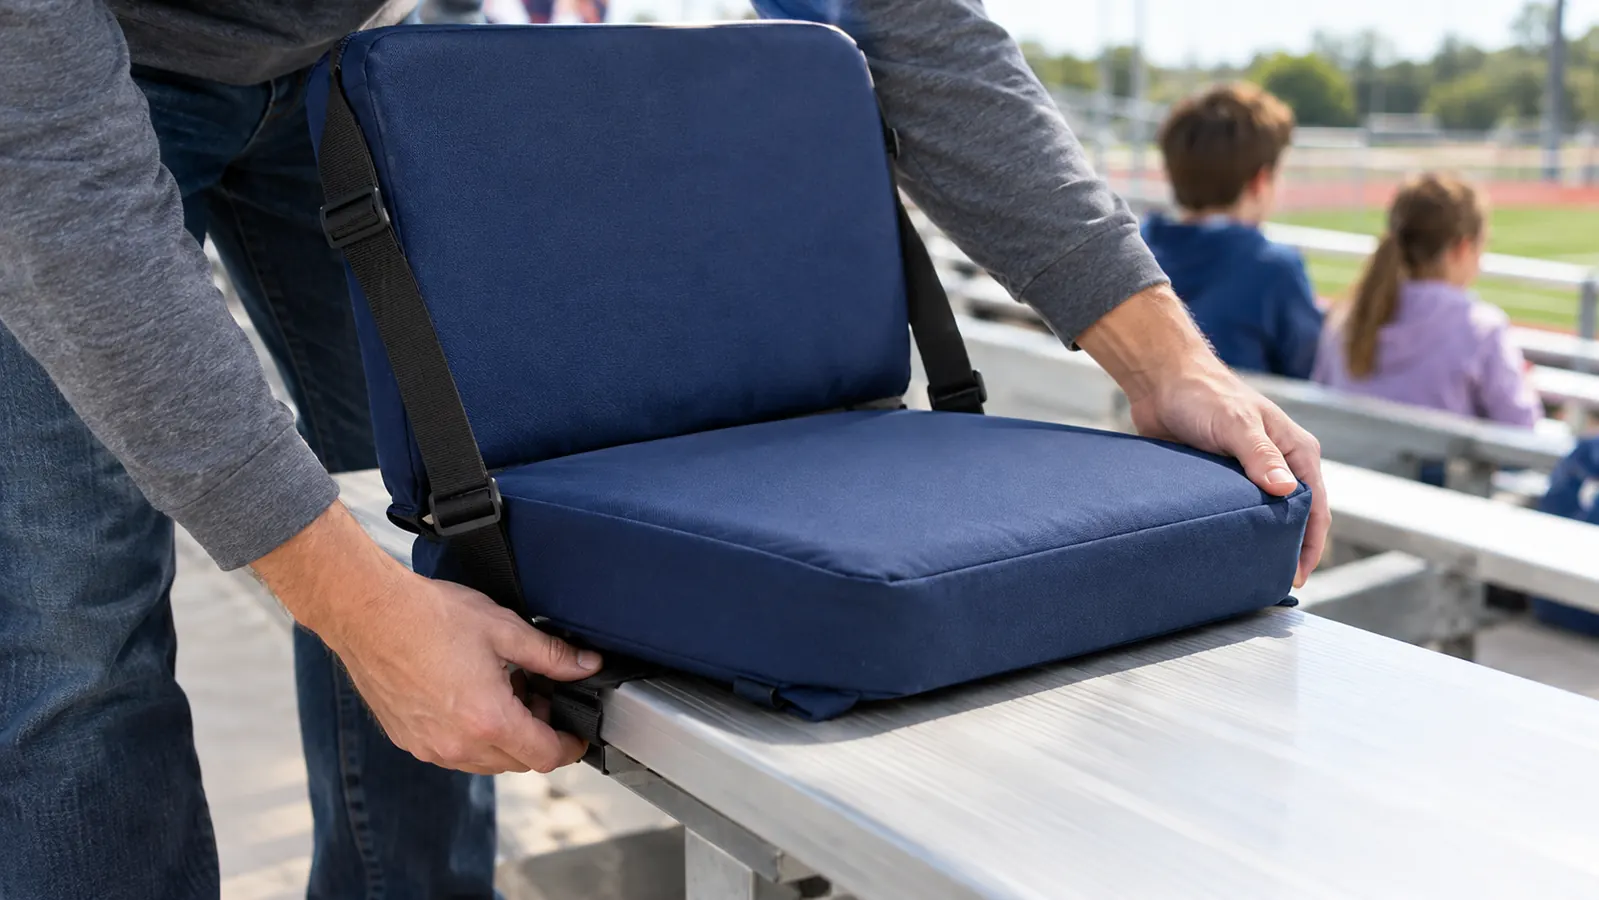
The most common mistake I see at games is a seat that is clipped on loosely. It shifts every time the person stands up, and by the fourth quarter they are basically sitting on the bench again. The Sport Beats seat has clips that hook over the front edge of the bleacher bench, and the trick is to make sure both clips are fully seated before you sit down.
I run my hand under the bench after I clip it on, just to confirm the clips are hooked over the edge and not resting on top of it. That takes about five seconds and it saves a whole game of adjusting. On older bleachers with a rounded front edge, I press down on the seat once before I sit to make sure it is snug.
One more thing: give yourself a little room from the people on either side. A stadium seat takes up roughly the same space as a person, but it is easier to clip on and adjust when you are not wedged between two families. We get to the bleachers a few minutes early, clip both seats on, and then Dave takes Ivy to the concession stand while I hold our spot.
The first time I clipped the seat on, I did it wrong. I hooked the clips over the top of the bench instead of the front edge, and the whole seat tipped forward the moment I sat down. Dave had to hold it while I fixed it, and we missed the opening kickoff. Now I check every time, and I have also learned to check the bench itself. Some of the away fields we visit have bleachers with a rounded metal edge, and the clips need to be pressed down firmly to catch it. A loose clip is not a small problem. It is the difference between watching the game and wrestling with your seat the whole time.
Step 3: Sit back and let the seat do the work
Once the seat is clipped on, sit all the way back so your lower back is touching the backrest. It sounds obvious, but most people sit on the front half of the seat, which means the back support does nothing. I catch myself doing it too, especially when I am watching the game closely.
When you sit back, the padding does its job and the backrest takes the weight off your spine. That is the whole point of a stadium seat, and it only works if you actually use it. I also keep my feet flat on the row below instead of tucking them under the bench, which helps my knees stay comfortable through a long game.
For Ivy, who is five, the seat is a little big on its own, so she sits on Dave's lap or on a blanket on the bench. The seat is really built for older kids and adults. Caleb, at eleven, uses his own seat and has no trouble with it. If you are buying for a younger child, plan for them to share your seat or sit on a blanket until they are big enough.
I noticed the difference on a Saturday in late October. Caleb's team was playing in a game that went into overtime, and we were on those bleachers for almost three hours. Dave and I both had our Sport Beats seats, and we were still comfortable at the end. The parents around us were standing up, stretching, and rubbing their lower backs. That was the moment I stopped thinking of the seat as a nice extra and started thinking of it as the most important thing in our game day bag.
Step 4: Carry it with the shoulder strap, not under your arm
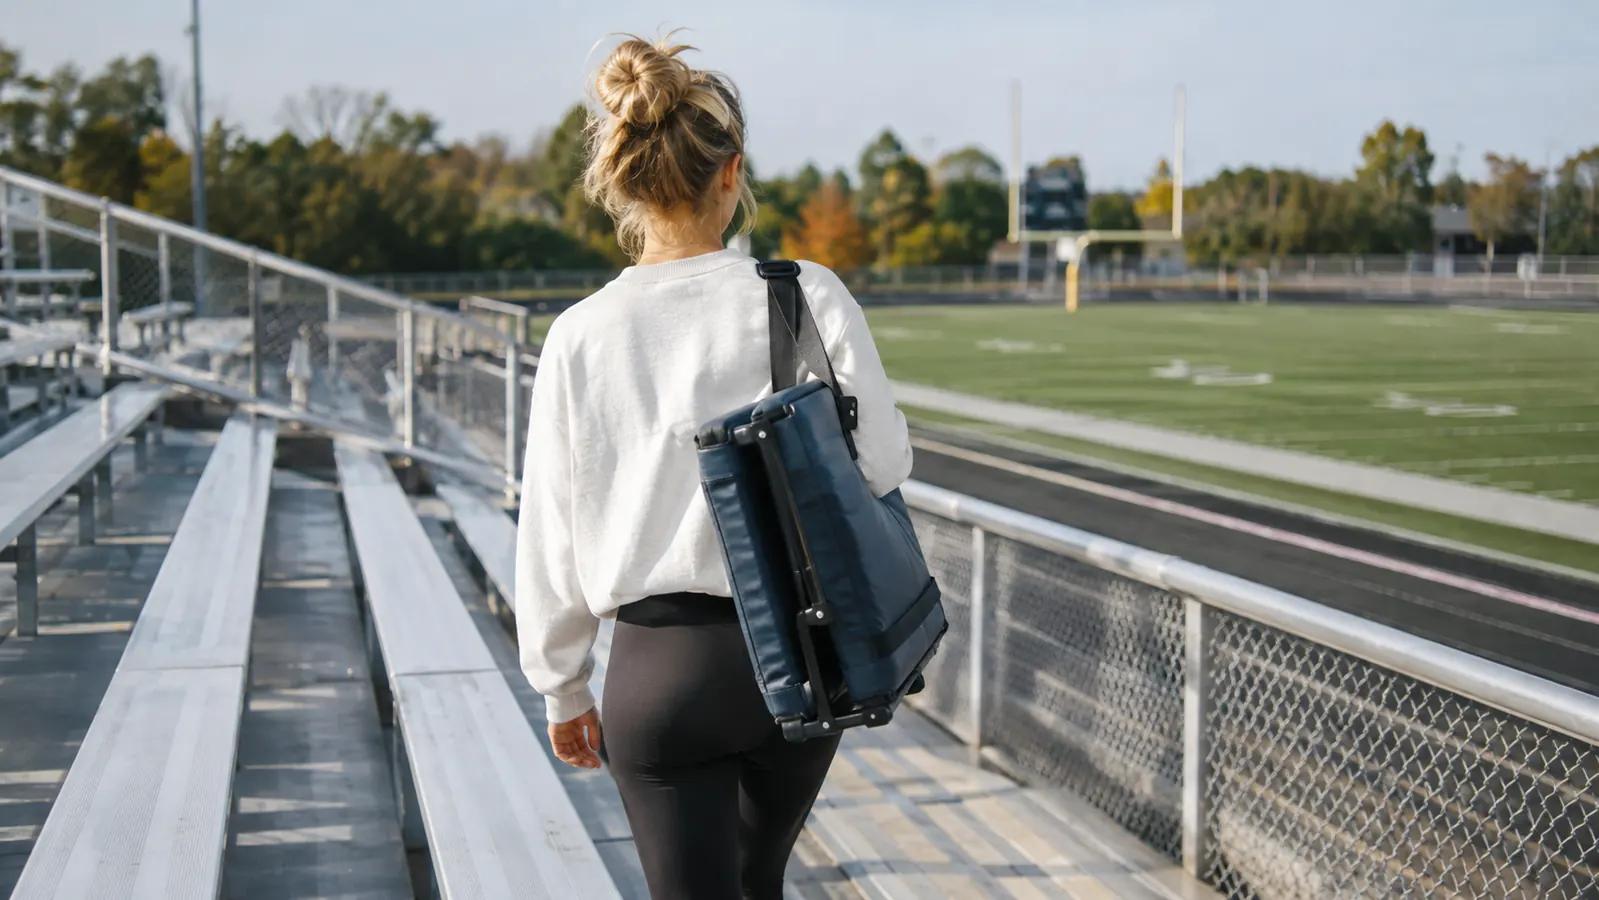
The Sport Beats seat folds flat and has a shoulder strap, and that strap is the difference between a smooth exit and a frustrating one. When the final whistle blows, I fold the seat, slip the strap over my shoulder, and I still have both hands free for Ivy and the snack bag. Dave does the same with his, and we are usually walking to the car while other families are still gathering their things.
If your seat does not have a strap, or you forget to use it, you end up carrying it under your arm while also holding a jacket, a water bottle, and a kid who is suddenly too tired to walk. I have been there. The strap fixes that whole problem.
I also keep the seats in the back of our Odyssey between games, folded flat against the side of the cargo area. That way they are always in the van when we need them, whether we are heading to a game, a parade, or my parents' place in Boise. A stadium seat is the kind of thing you forget at home if it is not already in the car.
The shoulder strap matters more than I expected. At the Seahawks game we went to in Seattle, we parked a long walk from the stadium, and I carried my seat the whole way without thinking about it. The strap sat on my shoulder the same way a purse strap does, and my hands stayed free for Ivy's hand and the bag of snacks. On the way back, Caleb fell asleep in the van before we even left the parking lot, and I was glad the seats were already folded and stowed instead of lying on the floor where someone would trip over them.
Step 5: Make it part of your game day routine
The families who are most comfortable at games are the ones who have a routine. Ours goes like this: the seats live in the Odyssey, the cooler bag goes in the night before, and the kids know that when we park, everyone carries something. Caleb carries his own seat, Dave carries the cooler, and I carry Ivy's blanket bag and the snacks.
Having a routine means nobody is standing around in the parking lot trying to remember what we forgot. It also means the seats actually make it to the bleachers. I have seen too many parents leave their stadium seats in the car because they did not want to carry them, and then spend the whole game leaning forward on their knees.
If you tailgate before the game, clip the seats on when you get to the bleachers, then leave them there while you go back to the parking lot. We have never had a problem with that at youth games or at the Seahawks game we went to in Seattle. The seats are still there when we come back, and it saves us from carrying them twice.
The routine took us a few games to figure out. At first we would grab the seats at the last minute, forget the blanket, and end up buying a ten dollar program just so Ivy had something to do. Now the night before a game, I set everything by the front door: two Sport Beats seats, the Lifewit cooler bag with frozen water bottles, Ivy's blanket, and a change of clothes for each kid. In the morning we load the van once, and nobody is running back inside for anything. That is the version of game day I want, and the seats are the reason it works.
What Else Helps
A stadium seat is the biggest upgrade, but a few small things make game day even better. I bring a blanket for Ivy to sit on and to cover her legs when the sun goes down. I pack the Lifewit cooler bag with frozen water bottles and sandwiches so nobody has to pay concession stand prices, and I always throw in an extra layer for each kid because stadium weather changes fast. The seats, the blanket, and the cooler all fit in the back of the Odyssey without a problem, which is exactly how I like it: everything in one place, ready to go.
Two seasons of youth football on metal bleachers, and the Sport Beats seat is the reason my back still works at the end of a game.
Get comfortable before the next game
The Sport Beats Stadium Seat folds flat, carries over your shoulder, and clips onto any bleacher bench. It has been in our game day routine for two seasons.
Amazon Check Today's Price on Amazon →